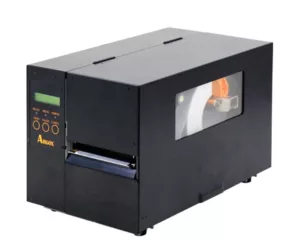
Installing a TSC label printer utilizes the robust Seagull Scientific Driver Wizard. Using this wizard ensures that the precise printer command languages (like TSPL, TPLE, or TPLZ) are correctly mapped to your hardware.
Here is the step-by-step installation guide.
Phase 1: Preparation
- Leave the printer turned off for now, but connect the USB cable from the printer to a USB port on your computer.
- Ensure the media (labels and ribbon, if applicable) is loaded correctly inside the printer.
- Go to the official TSC Website Download Page – https://emea.tscprinters.com/en/downloads
- Scroll Down and Choose the “Driver Tab”.
- Download the latest official TSC Windows Printer Drivers package from the official TSC Auto ID website or your provided installation media. It will typically be a .Zip File. Extract the Zip File and click on the executable File.
Phase 2: Unpacking the Driver Files
- Right-click the downloaded installer file and select Run as administrator.
- A Windows prompt will open the Seagull Driver Wizard license agreement. Select “I accept the terms…” and click Next.
- Choose the directory where the installation files will be extracted (the default path is almost always
C:\Seagull). Click Next. - Leave the checkmark enabled for “Run Driver Wizard after unpacking” and click Finish.
Phase 3: The Driver Installation Wizard
⚠️ Important: If Windows opens its own New Hardware Found notification or generic Add Printer wizard, cancel or close it immediately. Letting Windows guess the driver often results in communication errors or incorrect page sizes later on.
- On the Seagull Driver Wizard welcome screen, select Install printer drivers and click Next.
- Turn on your TSC printer now. 3. Select how your printer is connected:
- USB (Plug and Play): If connected via USB and turned on, the wizard should automatically detect your exact TSC model (e.g., TSC TE200 or TSC TTP-244 Pro) and the virtual USB port. Select it and click Next.
- Network (Ethernet) or Serial/Parallel: Select “Other”, click Next, manually choose your exact TSC model from the list, and then select the corresponding network IP port or physical port (
LPT1,COM1). Click Next.
- Specify Printer Name: Give your printer a recognizable name or leave it as default. You can also choose whether to set it as your default printer.
- Choose “Do not share this printer” (unless you need other network users to print directly through your PC host) and click Next.
- Review the installation summary page. If the model name and port look correct, click Finish.
Phase 4: Finalizing & Testing
- The wizard will install the system files, which might take a few moments. Once done, click Close.
- To ensure the driver is communicating properly with the hardware:
- Open the Windows Start menu, search for Printers & Scanners (or Devices and Printers in older Windows versions).
- Click on your newly installed TSC printer and select Printer Properties (not just Properties).
- Under the General tab, click Print Test Page.
- If successful, the printer will feed and print a standard Windows diagnostic layout.